
Why Understanding Residential Electrical Installation Matters
Residential electrical installation involves installing all the wiring, outlets, and components that safely power your home. Whether you’re building, renovating, or just want to understand your home’s power system, knowing the basics can prevent dangerous situations and save you money.
Key phases include:
- Planning and Design: Calculating loads, mapping circuits, and applying for permits.
- Rough-In: Installing boxes and running wires before the walls are finished.
- Finish Phase: Installing outlets, switches, and fixtures.
- Testing: Verifying the system is safe and functional.
The cost to wire a new house typically ranges from $4 to $9 per square foot, but this varies based on home size, complexity, and local labor rates.
Your home’s electrical system is its lifeline. Poor installation can lead to fires, electrocution, or costly repairs. The National Electrical Code (NEC) sets the minimum safety standards for all installations.
While replacing an outlet can be a DIY task, most residential electrical installation work requires a licensed electrician. Complex jobs like panel upgrades or whole-house wiring should always be left to professionals who understand codes and safety protocols.
I’m Jesse Burnett, a Master Electrician and founder of Dr. Electric CSRA. With over 1,200 completed projects, from new construction to smart home conversions, I know that professional execution is crucial for a safe, code-compliant system that protects your family and property.

Basic residential electrical installation vocab:
Understanding the Building Blocks of Your Home’s Electrical System
Think of your home’s electrical system as a network that keeps everything running. A residential electrical installation builds this lifeline, starting where power lines connect to your house at the service head. From there, electricity flows to your electrical service panel, the mission control for your home’s power.
This panel contains the main breaker (the master switch) and individual circuit breakers that protect different areas of your home. Unlike old-fashioned fuses that blow and need replacement, modern breakers simply trip (turn off) and can be reset. From the panel, wires and cables branch out through your walls, delivering power to outlets and switches.
Along the way, junction boxes safely contain wire connections, and in some areas like basements, conduits shield wires from damage. The most critical safety feature is grounding. Proper grounding is a critical aspect of electrical safety, providing a safe path for stray electricity to escape, preventing shocks and fires.
Key Components of a Residential Electrical Installation
- Main Service Panel: The heart of the system, distributing power into circuits. Most modern homes have a 200-amp panel to handle today’s electrical demands.
- Circuit Breakers: These safety switches have replaced fuses. They automatically shut off power during an overload or short circuit and can be easily reset.
- Receptacles (Outlets): You’ll find standard 120-volt outlets for everyday items, 240-volt outlets for large appliances (like dryers), and specialized GFCI/AFCI outlets for improved safety.
- Switches: These control the flow of electricity to lights and appliances. They range from simple on/off switches to three-way and dimmer switches.
- Light Fixtures: From recessed lighting to chandeliers, these connect directly to your home’s wiring.
- Grounding System: This invisible guardian provides a path for electrical current to safely discharge into the earth, drastically reducing the risk of shock. Learn more about electrical grounding for safety.
The Different Types of Wires and Cables Used in Homes
Different wires are used for specific jobs to ensure a safe residential electrical installation.

- Non-metallic (NM) cable: Known as “Romex,” this is the standard for indoor residential wiring.
- Armored (AC/BX) cable: A metal sheath protects these wires from physical damage, making them ideal for exposed areas like unfinished basements.
- Underground Feeder (UF) cable: A durable, moisture-resistant cable designed for outdoor use and direct burial in the ground.
- THHN/THWN wires: These individual wires are often pulled through protective conduits (metal or plastic tubes) for superior protection in certain applications.
- Low-voltage wiring: Used for doorbells, thermostats, and data networks, this wiring carries much lower, safer voltages.
Wire gauge indicates thickness—the smaller the number, the thicker the wire. For example, 14-gauge wire is used for lighting, while heavy-duty appliances need thicker 10, 8, or 6-gauge wires. You can find more info on gauge sizes.
Wire color codes are a critical safety language: Black and red wires are hot (carry current), white and gray are neutral (complete the circuit), and green or bare copper wires are for grounding.
The Blueprint: Planning Your Residential Electrical Installation Project
Proper planning is the foundation of any successful residential electrical installation. A project unfolds in three main stages: planning, rough-in, and finish, with permits and inspections ensuring safety and legality throughout the process.

Stage 1: Planning and Design
This initial phase is where we create the blueprint for your electrical system.
- Layout Planning: We determine the precise location for every outlet, switch, and light fixture.
- Calculating Electrical Load: We calculate your home’s total power needs to determine the correct size for your service panel and how to distribute circuits effectively. This prevents future issues like constantly tripped breakers.
- Circuit Mapping: We design individual circuits for different areas. We ensure you have convenient power access wherever you need it, often placing outlets closer together than the minimum code requirement to avoid the need for extension cords.
- Planning for Future Needs: We always recommend planning for the future. Whether it’s preparing for an EV Charger Installation or smart home integration, building in this capacity now saves significant cost and hassle later.
Stage 2: The Rough-In Phase
After the home’s framing is up, the physical installation begins.
- Installing Electrical Boxes: We install boxes for outlets, switches, and fixtures, ensuring they will sit flush with the finished walls.
- Drilling and Pulling Wire: We drill pathways through studs and joists and pull the appropriate cables from the panel location to each box. We protect wires in vulnerable spots with metal plates and leave extra length at each box for future flexibility.
- Stapling Cable: Wires are secured to the framing to prevent sagging and ensure they stay in place for the life of the home.
- Rough-in Inspection: A local building inspector must approve the work before the walls are closed up. This is a critical safety check.
Stage 3: The Finish Phase
Once the walls are finished, we bring the system to life.
- Installing Devices: We connect and install all outlets (including GFCI/AFCI), switches, and dimmer controls.
- Connecting Fixtures: We mount and connect light fixtures and ceiling fans. A Ceiling Fan Installation requires a special box rated for the weight and movement.
- Final Inspection: The building inspector returns to verify the completed residential electrical installation meets all code requirements.
- System Testing: We conduct a final quality check, running continuity, polarity, and voltage tests to ensure every part of the system is working correctly and safely.
Safety First: Essential Codes and Principles
When it comes to residential electrical installation, safety is a matter of life and death. Electricity is unforgiving, which is why every project must be grounded in strict safety protocols and code compliance.

Basic safety rules are non-negotiable: always wear Personal Protective Equipment (PPE), turn off power at the main panel, and use a voltage tester to confirm a circuit is dead before working on it. Never overload circuits, and always keep water far away from electrical work.
Key Safety Principles and Common Electrical Codes
All electrical work is governed by The National Electrical Code, or NEC, which is updated every three years to incorporate the latest safety standards.
- GFCI Protection: Ground Fault Circuit Interrupters are lifesavers that prevent electric shock. They instantly cut power if they detect an imbalance in the current. The NEC requires them in all wet locations like bathrooms, kitchens, garages, and outdoors.
- AFCI Protection: Arc Fault Circuit Interrupters prevent fires by detecting dangerous arcing faults caused by damaged wires or loose connections. The NEC requires them on most circuits in living areas.
- Grounding Requirements: A proper grounding system provides a safe path for fault currents, protecting people and electronics. All outlets and equipment must be grounded.
- Outlet Placement Rules: The NEC’s “6-12 Rule” requires an outlet to be placed so that no point along a wall is more than 6 feet from a receptacle. This reduces the need for hazardous extension cords.
- Box Fill Calculations: Electrical boxes have a capacity limit. Overstuffing them with wires and devices creates a fire hazard due to heat buildup.
Code Requirements for Kitchens and Bathrooms
These rooms have strict codes due to the combination of water and high-power appliances.
- Kitchens: A new kitchen requires at least eight separate circuits, including two 20-amp circuits for countertop outlets, plus dedicated circuits for the refrigerator, dishwasher, disposal, and microwave. An electric range needs its own 240-volt, 50-amp circuit. All countertop outlets must have GFCI protection.
- Bathrooms: A bathroom must have at least one dedicated 20-amp circuit for its receptacles. All bathroom outlets require GFCI protection, and light fixtures near a tub or shower must be damp-rated.
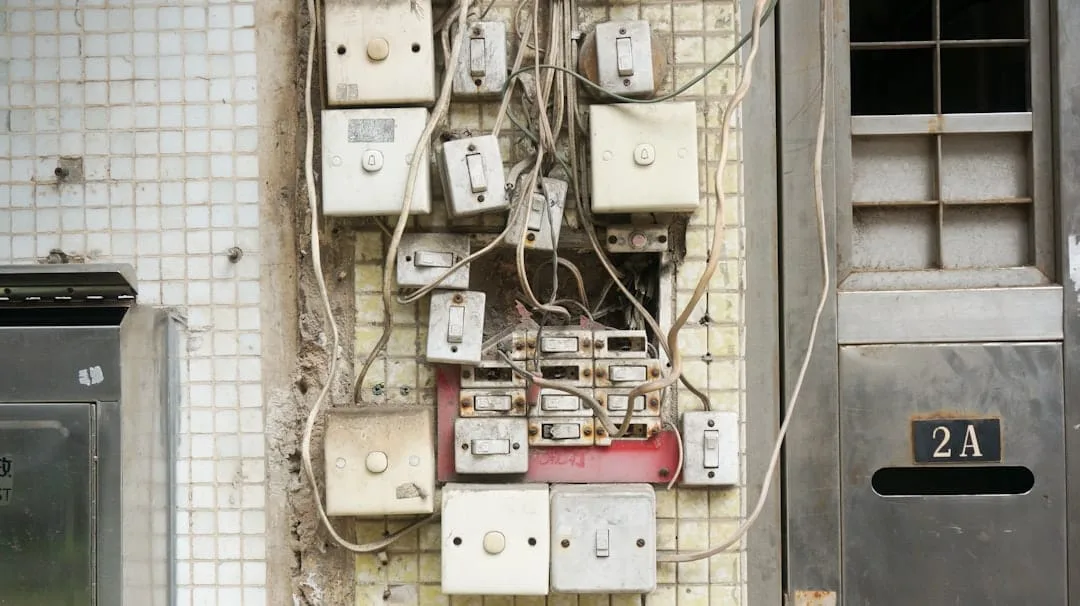
Common Issues in a Residential Electrical Installation
Recognizing warning signs can prevent a minor issue from becoming a major hazard.
- Flickering Lights: Often indicates a loose connection or overloaded circuit.
- Tripping Breakers: A repeatedly tripping breaker signals an overload, short circuit, or ground fault.
- Dead Outlets: Can be caused by a tripped breaker, but could also indicate a loose wire or faulty outlet.
- Outdated Wiring: Knob and tube wiring, common in homes built before the 1950s, lacks a ground wire and deteriorates over time, posing a serious fire risk. It typically requires a full replacement, costing between $12,000 and $35,000.
If you experience these issues, call a professional for electrical repair services to diagnose and fix the problem safely.
DIY vs. Calling a Pro: Making the Smart Choice
While the satisfaction of a DIY project is undeniable, residential electrical installation is one area where the risks often outweigh the rewards. A mistake can lead to electric shock, house fires, or code violations that can void your insurance and complicate a home sale.
My rule of thumb is simple: if the job is more complex than replacing a basic switch or outlet, it’s time to call an electrician. New circuits, panel work, or whole-house rewiring require professional expertise. Licensed electricians carry the training, tools, and licensing and insurance to protect you from liability and ensure the job is done safely.
Understanding the Costs of Professional Installation
Professional installation costs more upfront than a DIY approach, but you’re paying for expertise, safety, and peace of mind. Here’s a breakdown of typical costs:
| Task / Factor | DIY (materials only, if applicable) | Professional Installation (includes labor & materials) |
|---|---|---|
| Wiring a new house | $2-$4 per sq ft (materials) | $4-$9 per sq ft, or $6,000-$22,500 (1,500-2,500 SF) |
| Rewiring a house | $2-$7 per sq ft (materials) | $5-$17 per sq ft, or $10,000-$50,000 |
| Electrical rough-in labor | N/A | $50-$130 per hour |
| Electrical panel replacement | N/A | $850-$2,500 |
| Upgrade 100-amp to 200-amp | N/A | $1,400-$2,800 |
| New circuit & breaker | N/A | $150-$300 |
| New dedicated circuit | N/A | $250-$900 |
| New electrical outlet | N/A | $150-$350 |
| Replace with GFCI outlet | N/A | $90-$200 |
| New light switch | N/A | $100-$300 |
| Grounding an outlet | N/A | $100-$300 |
| Electrical inspection | N/A | $100-$200 |
| Electrical permit | N/A | $50-$350+ |
Electrician hourly rates generally fall between $50 and $100 per hour, with master electricians charging more. Emergency calls can double these rates. Permit costs range from $50 to $350+ and are required for most significant electrical work to ensure it’s inspected and safe. For most jobs, costs are split roughly 50/50 between materials and labor.
When You Should Hire a Professional for a Residential Electrical Installation
Certain jobs are never suitable for DIY. Always hire a professional for:
- New Construction & Whole-House Rewiring: These are complex projects that involve designing and installing an entire electrical system from scratch.
- Service Panel Upgrades: The panel is the heart of your system; mistakes here are dangerous and can affect your entire home.
- Adding New Circuits: This requires proper load calculations and safe integration into your existing panel.
- Troubleshooting Complex Issues: Persistent problems like flickering lights or tripping breakers often point to deeper issues that require diagnostic expertise.
- Ensuring Code Compliance: An electrician ensures your residential electrical installation passes inspection and meets all current safety standards, protecting you legally and financially.
Future-Proofing Your Power System
A smart residential electrical installation meets today’s needs while anticipating tomorrow’s. As technology and energy demands evolve, designing an adaptable system protects your investment and prevents costly future upgrades.

Future-proofing involves planning for energy efficiency, ensuring system expandability, and embracing emerging technologies like smart homes and EV charging. It’s far more cost-effective to build in extra capacity during the initial installation than to retrofit a finished home later.
Designing for Energy Efficiency
An energy-efficient system works smarter to lower your utility bills. Key strategies include:
- LED Lighting: LEDs use up to 80% less energy and last 25 times longer than traditional bulbs.
- Smart Thermostats: These devices learn your habits and can reduce heating and cooling costs by 10-15%.
- Dimmer Switches: Dimmers save energy by reducing power to lights and can extend bulb life.
- Load Management: Smart outlets and whole-home energy monitors help you manage power consumption and identify energy-wasting devices.
Planning for Future Needs
Building an electrical system with room to grow is a wise investment.
- Additional Circuit Capacity: Installing a larger panel (e.g., 200-amp) with extra slots provides the flexibility to add circuits later without a major upgrade.
- EV Charging Circuits: A dedicated 240-volt circuit for a Level 2 EV charger is becoming a must-have feature. Installing the wiring now adds value and convenience, even if you don’t yet own an EV.
- Whole House Generator Installation: A generator provides seamless power during outages. Our whole house generator installation services ensure your home stays safe and functional when the grid goes down.
- Whole-Home Surge Protection: A surge protection system installed at your panel protects all your electronics from damaging power surges. With thousands of dollars of sensitive electronics in the average home, this is essential protection.
Our team stays current on the latest trends to ensure your electrical upgrades position your home for the future.
Conclusion
After walking through the ins and outs of residential electrical installation, from understanding your home’s electrical backbone to navigating complex safety codes, you’re now equipped with the knowledge to make informed decisions about your electrical system.
Safety is paramount in everything we do. Electricity doesn’t give second chances, which is why understanding basic safety principles and following codes like the NEC isn’t just recommended—it’s essential for protecting your family and property.
The value of professional expertise cannot be overstated. While swapping out a light switch might be within your wheelhouse, complex residential electrical installation work requires the trained eye of a licensed electrician. We bring years of experience, up-to-date code knowledge, and the proper tools to ensure your project is completed safely and correctly the first time.
Code compliance benefits extend far beyond just passing inspection. When your electrical work meets or exceeds current standards, you’re protecting your home’s value, ensuring your insurance remains valid, and most importantly, keeping your loved ones safe from electrical hazards.
Planning for the future might seem like an afterthought, but it’s one of the smartest investments you can make. Whether it’s adding capacity for an electric vehicle charger, preparing for a home generator, or simply leaving room for expansion in your electrical panel, thinking ahead saves you significant time and money down the road.
At Dr. Electric CSRA, we understand that your home’s electrical system is more than just wires and outlets—it’s the foundation that powers your daily life. Our licensed, insured team takes pride in delivering quality workmanship that you can count on, whether it’s a simple repair or a complete residential electrical installation for new construction.
We’ve been serving the Augusta, GA area with reliable, code-compliant electrical solutions, and we’re here when you need us most with 24/7 emergency service. For a safe and reliable electrical system that’s built to last, trust the experts for your Residential Electrical Services.